
Monitoring Cloudflare DNS
Monitoring your Cloudflare DNS records automatically is made easy with ZoneWatcher. After you've added your account credentials, we will automatically import all of your domains and begin monitoring them for changes.
Generating your Cloudflare API Token
To get started adding your Cloudflare account, you'll first want to generate an API token on Cloudflare's dashboard. We use this token to automatically fetch the domains and associated DNS records.
For monitoring-only use, we recommend you limit the token to only the permissions required to fetch the domains and DNS records. You can do this by selecting the "Create Custom Token" template when generating the token and selecting only Zone:DNS:Read and Zone:Zone:Read. This will ensure that the token can only be used to read your DNS records and not modify them.
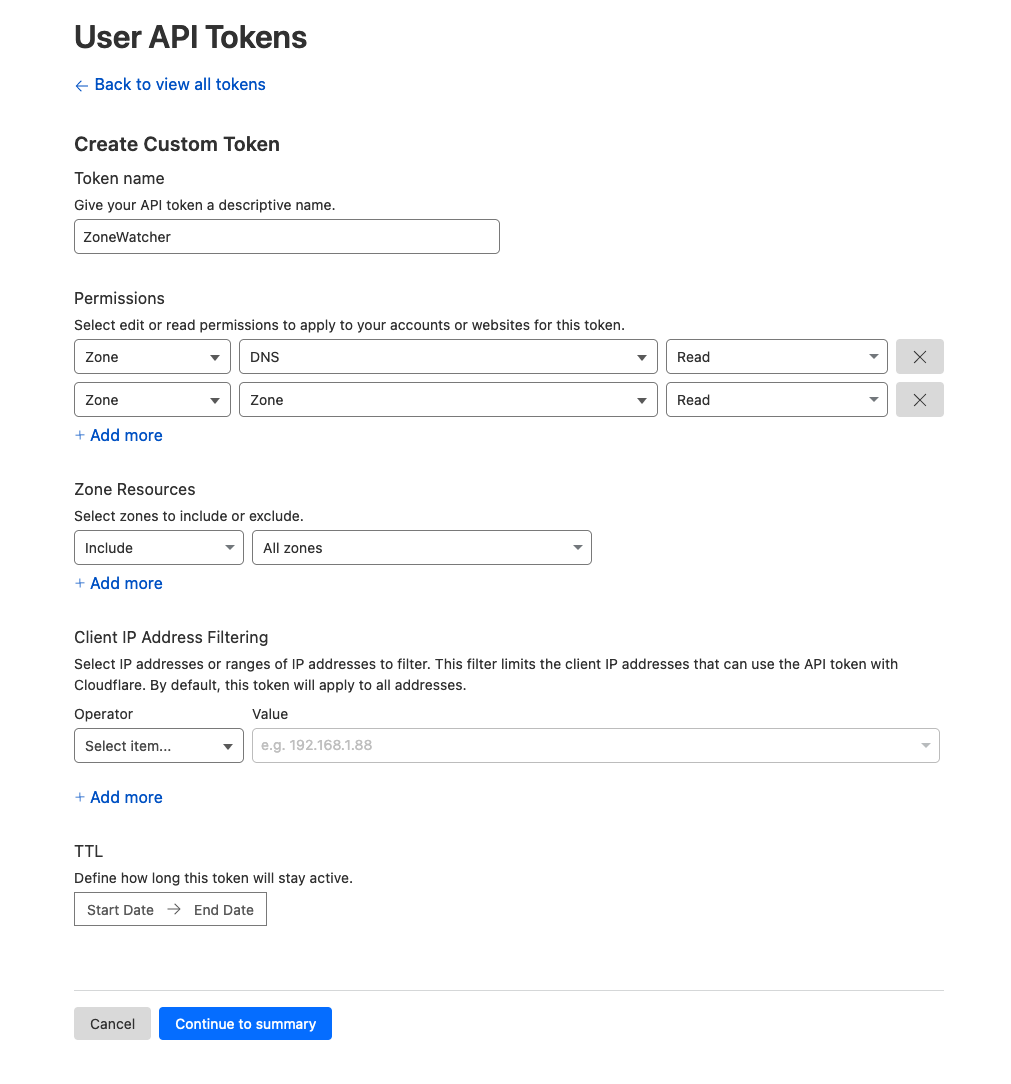
Permissions for Change Management & Rollback
If you plan to use ZoneWatcher's Change Management or rollback features, the read-only token above is not sufficient — those features write back to Cloudflare on your behalf to apply approved changesets and revert unauthorized changes.
Generate a Custom Token with the following permissions instead:
- Zone — DNS — Edit
- Zone — Zone — Read
Zone:DNS:Edit implicitly grants read access in addition to create, update, and delete on DNS records. Set the Zone Resources to either "All zones" or to the specific zones you want ZoneWatcher to manage. If you only want change notifications, stick with the read-only permissions described above.
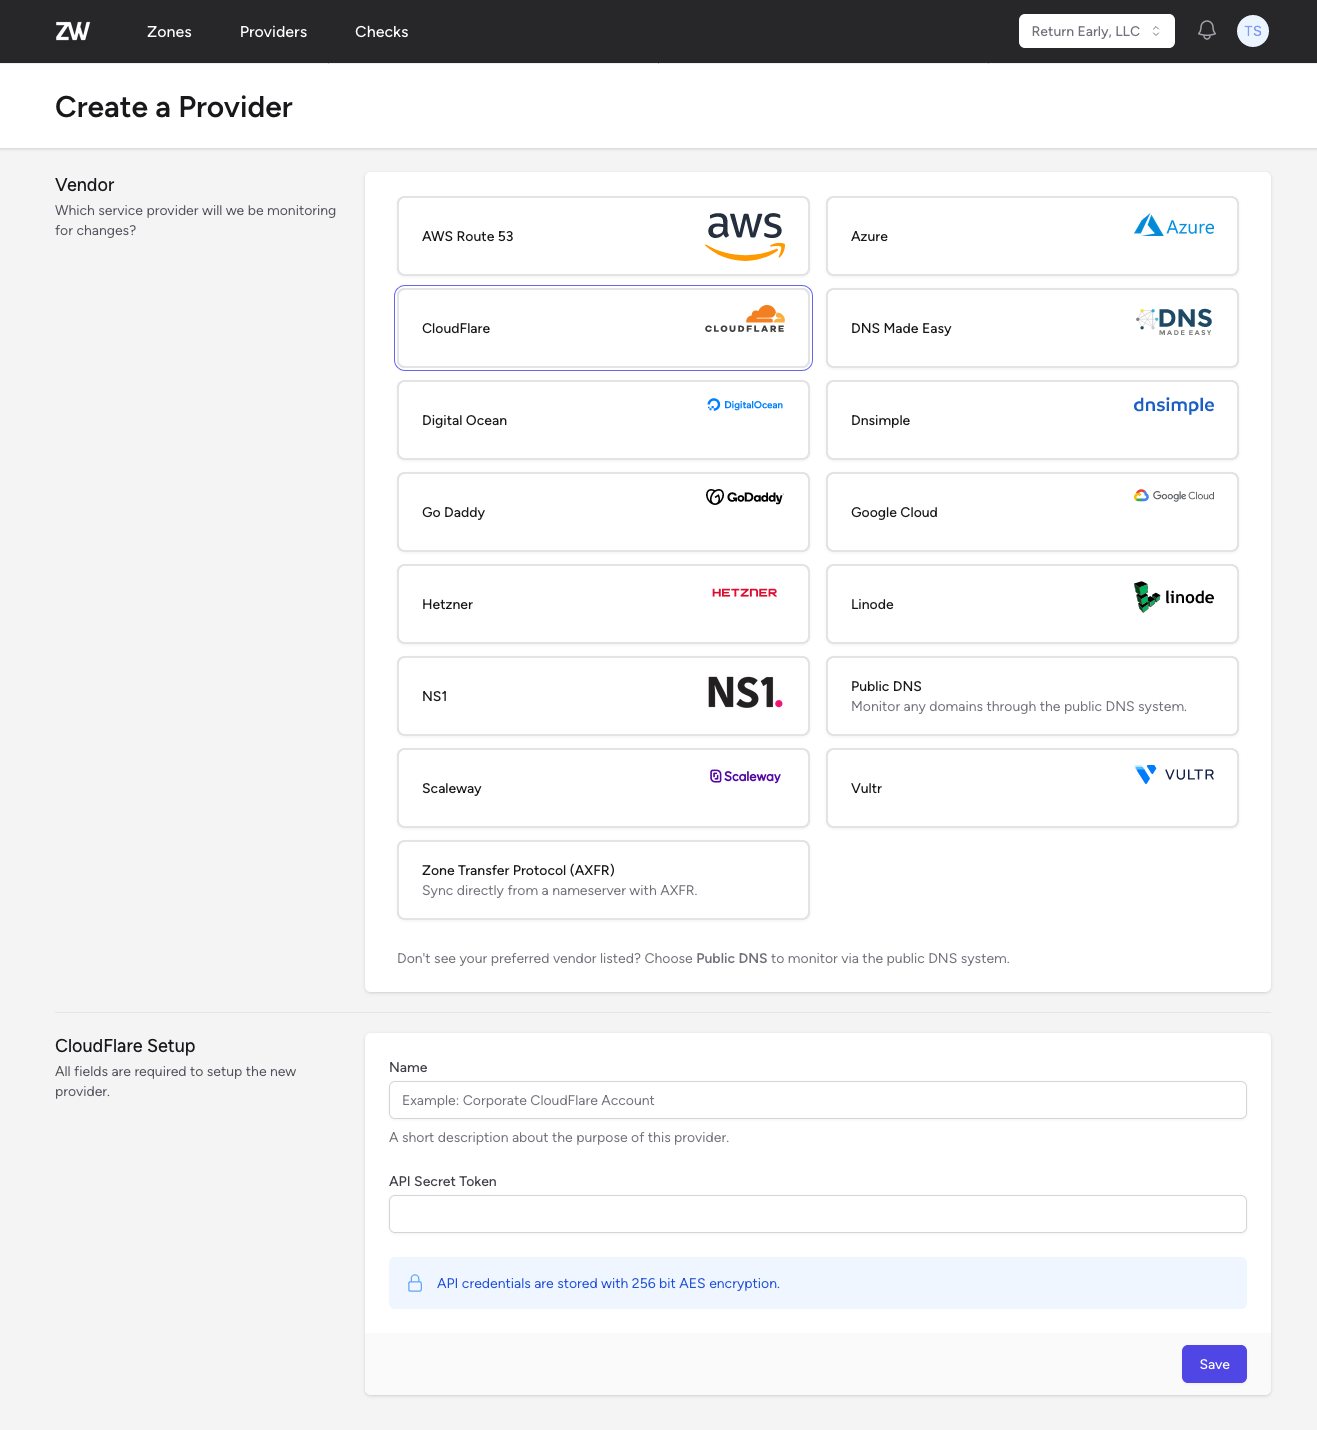
Creating your Cloudflare Provider
Once you've generated your API token, you can create your new Cloudflare provider on ZoneWatcher by giving it a descriptive name and pasting in the API token you generated.
Monitoring Your Zones
After you've created your Cloudflare provider, we will sync all the zones associated with your account and their associated DNS records. You'll be able to view them from either the Provider's page or the Zone Dashboard.